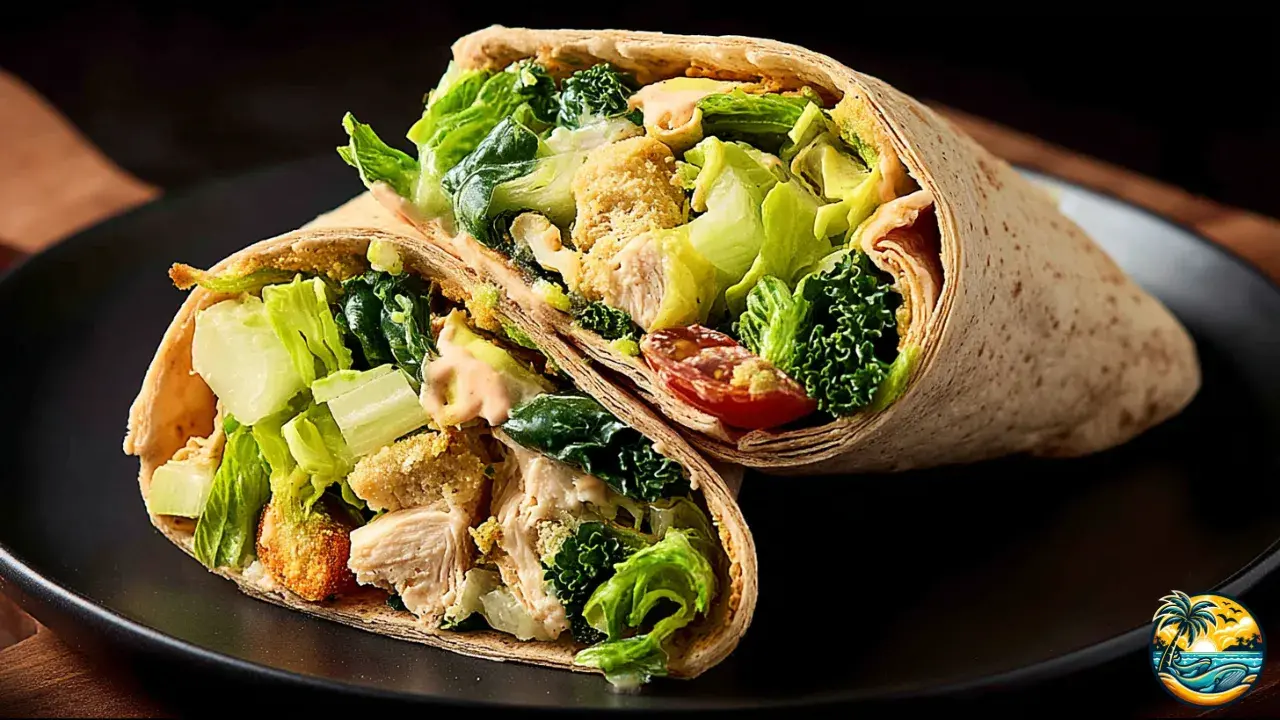
Chicken Caesar Wraps
Savor the World.
Chicken Caesar Wraps
When we have super busy days, there's nothing better than a recipe that combines the freshness of a Caesar salad with the convenience of a wrap you can take anywhere—and best of all, it’s quick and super easy to make. These Chicken Caesar Wraps will be your new go-to: perfect for light lunches, last-minute dinners, or prepping your meals for the week. Besides being delicious, what you’ll love the most is how simple they are to put together and how much the whole family enjoys them!

Chicken Caesar Wraps
Servings:2 wraps
Prep Time: 10 minutes
Cook Time: 10 minutes
Total Time: 20 minutes
Ingredients:
- 2 cups (280 g) cooked chicken breast, shredded or sliced
- 1/4 cup (60 ml) Caesar dressing
- 2 large flour tortillas (10 inches / 25 cm)
- 1 cup (60 g) chopped romaine lettuce
- 1/4 cup (25 g) grated Parmesan cheese
- 1/4 cup (30 g) cherry tomatoes, halved (optional)
- Salt and pepper to taste
What you’ll need:
- Skillet or grill pan
- Knife and cutting board
- Spatula
- Mixing bowl
See 5 variations of the recipe at the end.
You might also be interested in:
Did You Know?
Classic Caesar dressing didn’t originally have anchovies—wild, right? And fun fact: the Caesar salad was born in Tijuana during a shortage of ingredients… the chef just used whatever he had in the kitchen!

Instructions:
- Mix the chicken with the dressing: Alright, let’s get started! In a large mixing bowl, add your cooked chicken—either shredded or in thin strips. Gradually pour in the Caesar dressing while mixing with a spoon or spatula to coat the chicken evenly without making it too soggy. Taste and adjust with a bit of salt and pepper. If you’re up for it, squeeze in a little lemon juice for a fresh, tangy twist.
- Prep the tortillas: Time to work on the tortillas! Lay them out on a clean, flat surface like a cutting board or a large plate. If they feel cold or stiff, warm them for a few seconds in a skillet or on a griddle—trust me, this makes them way easier to roll without tearing. Once warm, layer some chopped romaine lettuce in the center of each tortilla, leaving space around the edges so you can fold them easily.
- Add the chicken on top of the lettuce: Now, gently spoon the chicken mixture onto the bed of lettuce. Try to divide it evenly between the two tortillas so both wraps come out balanced. Lightly flatten the filling a bit with your spoon to make it easier to fold and to give your wrap a cleaner look when you cut it later.
- Add cheese and tomatoes: Now for the flavor boost! Sprinkle grated Parmesan over the chicken—not only does it add that savory kick, it also gives a great texture. If you're using cherry tomatoes, slice them in halves or quarters and place them carefully so they don't fall out when rolling. You can also add a dash of black pepper if you like a little more spice.
- Roll the wraps: You’re almost done! To roll, fold the sides of the tortilla inward, then roll it up tightly from the bottom, gently pressing as you go to hold everything together. Make sure the seam ends up on the bottom so the wrap stays sealed and keeps its shape.
- Toast the wraps (optional): This step is optional, but honestly—it makes a huge difference! For a warm, golden, slightly crispy wrap, heat a non-stick skillet over medium heat. Place your wrap seam-side down and toast for about 2 minutes on each side, or until nicely browned and heated through. That’s it!


Ingredient Substitutions
- Tortillas: If you don’t have flour tortillas, you can totally use whole wheat, spinach, or even corn wraps.
- Dressing: You can swap the Caesar dressing for plain Greek yogurt mixed with lemon juice and a bit of mustard.
- Cheese: No Parmesan? No problem—try Cotija or shredded mozzarella instead.
- Protein: No chicken on hand? Use beef, grilled tofu, or even cooked chickpeas for a veggie option that still fills you up.

Prep Tips
- Cooking the chicken: Always make sure your chicken is fully cooked and juicy—dry chicken is never fun in a wrap.
- Handling tortillas: Heat the tortillas just a little before assembling. It makes them way easier to roll and helps keep them from tearing.
- Ingredient balance: Don’t overload the center! Too much filling makes the wrap hard to close and more likely to fall apart.
- To-go tip: If you’re taking them with you, wrap them in parchment paper or foil so they hold their shape better.

Nutrition Facts (per serving):
- Calories: 410 kcal
- Protein: 29 g
- Healthy fats: 18 g
- Carbohydrates: 30 g
- Natural sugars: 3 g
- Fiber: 2 g
- Sodium: 650 mg

Nutritional Highlights:
This tasty wrap gives you a well-balanced mix of lean protein from the chicken—perfect for muscle support and keeping you full longer. The Caesar dressing adds a creamy touch along with healthy fats that help your body absorb vitamins. The romaine lettuce brings freshness and fiber, while the Parmesan cheese delivers a boost of calcium for strong bones. It’s a flavorful, satisfying, and easy-to-make option that fits perfectly into a balanced lifestyle.

Storing & Reheating
- Refrigeration: You can store fully made wraps in the fridge for up to 2 days, wrapped in plastic or sealed in an airtight container.
- Reheating on the skillet: Just heat them in a hot skillet for a few minutes—just don’t walk away and let them burn!
- Microwave option: It’s quicker, but less crispy—just warm them in the microwave wrapped in a paper towel.

Story or Inspiration Behind the Recipe
This wrap is basically a portable twist on the classic Caesar salad, which was actually created in Mexico by Italian chef Caesar Cardini. If you’re looking for something quick, tasty, and easy to take on the go, this one’s for you. It was originally a creative way to use up leftover chicken—and now it’s a favorite on menus everywhere!

Serving Suggestions
- Pair your Chicken Caesar Wraps with a fresh cucumber and avocado salad with lime.
- Baked sweet potato or carrot chips make an awesome side.
- A chilled mint lemonade goes perfectly with the wraps on a warm day.
- Apple slices with cinnamon and a little yogurt are a sweet, healthy add-on.
- Finish with a dark chocolate mousse topped with berries for a simple dessert.

Frequently Asked Questions
- Can I use store-bought rotisserie chicken? Absolutely—great time-saver and they taste delicious. Just be sure to remove the bones before mixing it in.
- Can this wrap be made gluten-free? Yes! Just switch the tortillas for a gluten-free version—most stores have them these days.
- What if I don’t like Caesar dressing? No worries—you can use ranch, honey mustard, or even hummus instead.
- Can I make them ahead for lunch? Yes! Just hold off on adding the lettuce until you’re ready to eat so it doesn’t wilt and get soggy.
- Can I freeze them? Not the best idea. The lettuce and dressing won’t hold up well after thawing—they end up kinda weird, honestly.


Recipe Variations
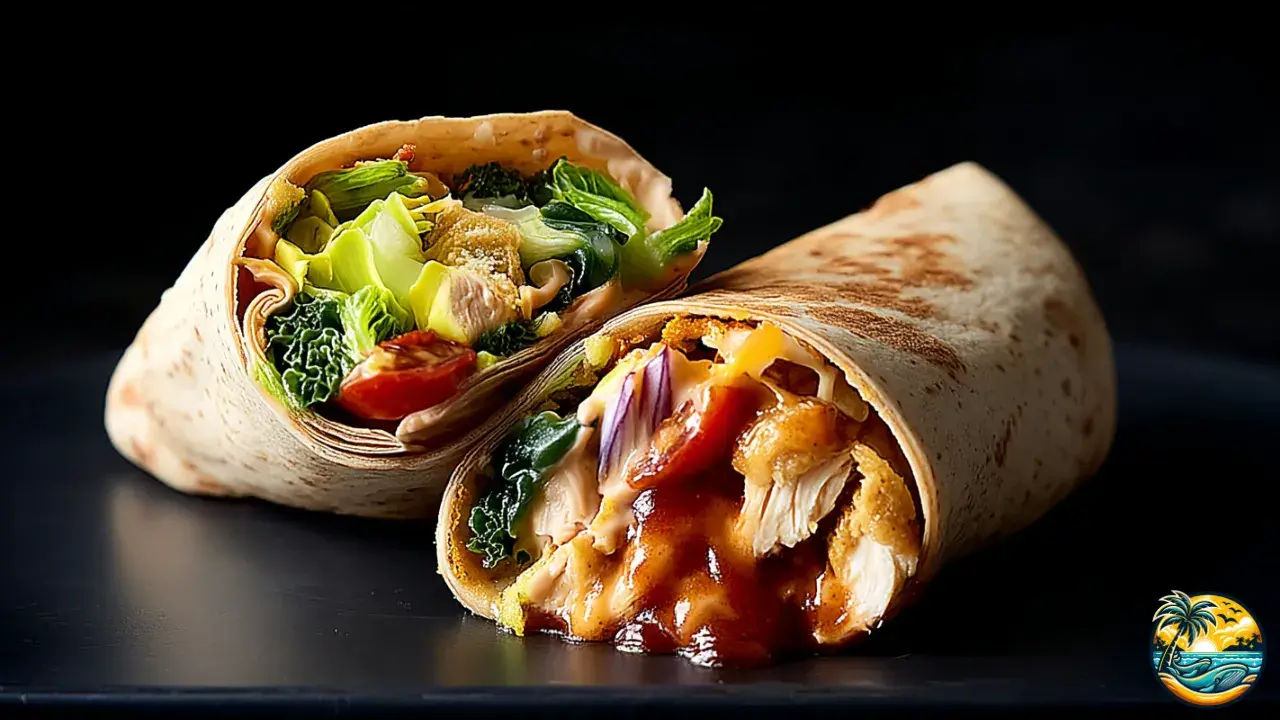
- BBQ-style Wrap: This one's a crowd-pleaser! Just swap the Caesar dressing for BBQ sauce and add some thin-sliced red onion—super tasty.
- Mediterranean Wrap: Into Euro flavors? Use hummus as your base, add cucumber strips and crumbled feta for a fresh Mediterranean vibe.
- Tex-Mex Wrap: Love Southwestern flavors? Toss in some black beans, corn, and your favorite spicy salsa for a fun twist.
- Vegetarian Wrap: For your vegan or plant-based friends, swap the chicken for mashed chickpeas and avocado slices—tons of fiber, no meat.
- Low-carb Wrap: Trying to keep it light? Use large lettuce leaves instead of tortillas to cut down on carbs without losing flavor.

And that’s it! Now you know how to make these delicious—and most importantly, super easy—Chicken Caesar Wraps. I really hope you give them a try, because even though they’re quick and simple to make, they’re full of flavor and sure to be a hit with your people. Remember, cooking is also a way to treat your loved ones—and yourself—while enjoying simple, tasty moments. Happy cooking!

Tastes of La Paz.
Chicken Caesar Wraps
Servings:2 wraps
Prep Time: 10 minutes
Cook Time: 10 minutes
Total Time: 20 minutes
Ingredients:
- 2 cups (280 g) cooked chicken breast, shredded or sliced
- 1/4 cup (60 ml) Caesar dressing
- 2 large flour tortillas (10 inches / 25 cm)
- 1 cup (60 g) chopped romaine lettuce
- 1/4 cup (25 g) grated Parmesan cheese
- 1/4 cup (30 g) cherry tomatoes, halved (optional)
- Salt and pepper to taste
What you’ll need:
- Skillet or grill pan
- Knife and cutting board
- Spatula
- Mixing bowl
Instructions:
- Mix the chicken with the dressing: Alright, let’s get started! In a large mixing bowl, add your cooked chicken—either shredded or in thin strips. Gradually pour in the Caesar dressing while mixing with a spoon or spatula to coat the chicken evenly without making it too soggy. Taste and adjust with a bit of salt and pepper. If you’re up for it, squeeze in a little lemon juice for a fresh, tangy twist.
- Prep the tortillas: Time to work on the tortillas! Lay them out on a clean, flat surface like a cutting board or a large plate. If they feel cold or stiff, warm them for a few seconds in a skillet or on a griddle—trust me, this makes them way easier to roll without tearing. Once warm, layer some chopped romaine lettuce in the center of each tortilla, leaving space around the edges so you can fold them easily.
- Add the chicken on top of the lettuce: Now, gently spoon the chicken mixture onto the bed of lettuce. Try to divide it evenly between the two tortillas so both wraps come out balanced. Lightly flatten the filling a bit with your spoon to make it easier to fold and to give your wrap a cleaner look when you cut it later.
- Add cheese and tomatoes: Now for the flavor boost! Sprinkle grated Parmesan over the chicken—not only does it add that savory kick, it also gives a great texture. If you're using cherry tomatoes, slice them in halves or quarters and place them carefully so they don't fall out when rolling. You can also add a dash of black pepper if you like a little more spice.
- Roll the wraps: You’re almost done! To roll, fold the sides of the tortilla inward, then roll it up tightly from the bottom, gently pressing as you go to hold everything together. Make sure the seam ends up on the bottom so the wrap stays sealed and keeps its shape.
- Toast the wraps (optional): This step is optional, but honestly—it makes a huge difference! For a warm, golden, slightly crispy wrap, heat a non-stick skillet over medium heat. Place your wrap seam-side down and toast for about 2 minutes on each side, or until nicely browned and heated through. That’s it!
Nutritional Information (per serving):
- Calories: 410 kcal
- Protein: 29 g
- Healthy fats: 18 g
- Carbohydrates: 30 g
- Natural sugars: 3 g
- Fiber: 2 g
- Sodium: 650 mg

Tastes of La Paz.