10 Cute and Easy Halloween Nail Designs
• Posted Sep 19 • 2024.
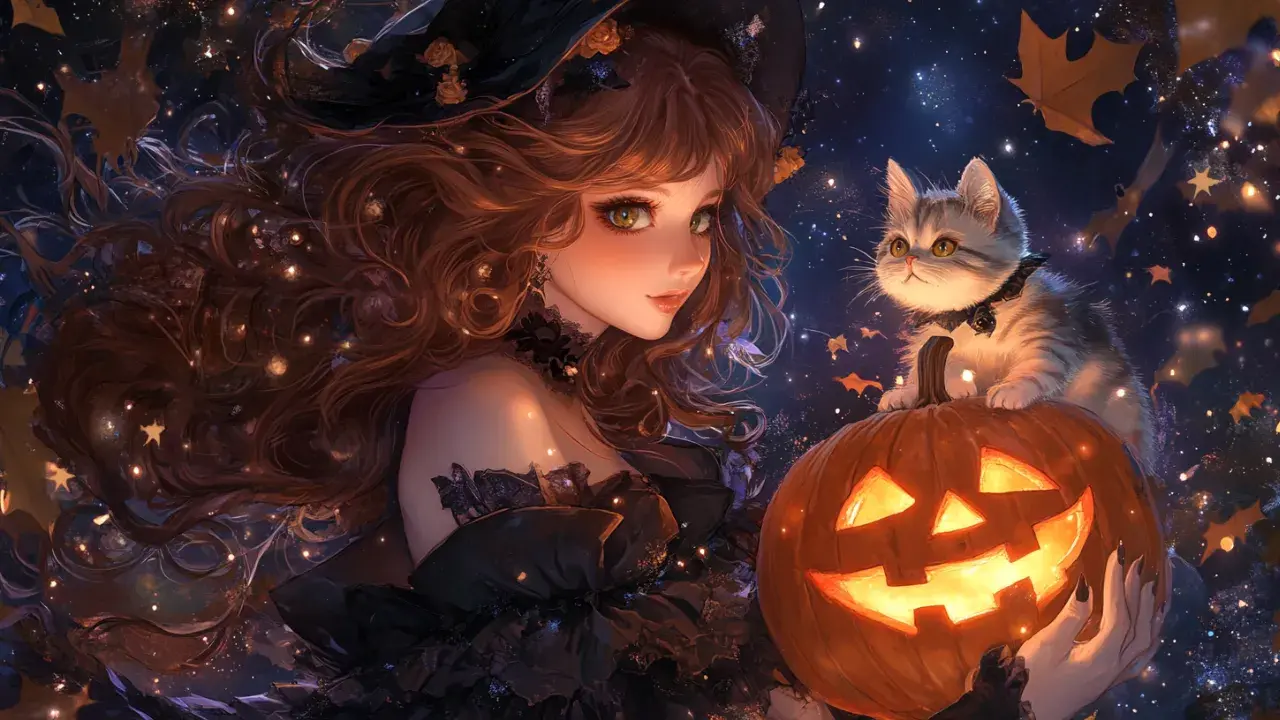
Living near the beach doesn’t mean we can’t celebrate Halloween! If you love decorated nails as much as I do, you’re in for a treat! These 10 cute and easy Halloween nail designs will have your hands looking spooky and fabulous in no time!
Cute and Easy Halloween Nail Designs
1. Minimalist Ghost Nails
Description: Start with a white polish base and then draw small ghost faces with black eyes and mouths at the top of each nail. You can make them in different sizes for a more playful look.
How to do it: Use a fine brush or a toothpick to draw the eyes and mouth on each nail after applying the white polish.

You might also be interested in:
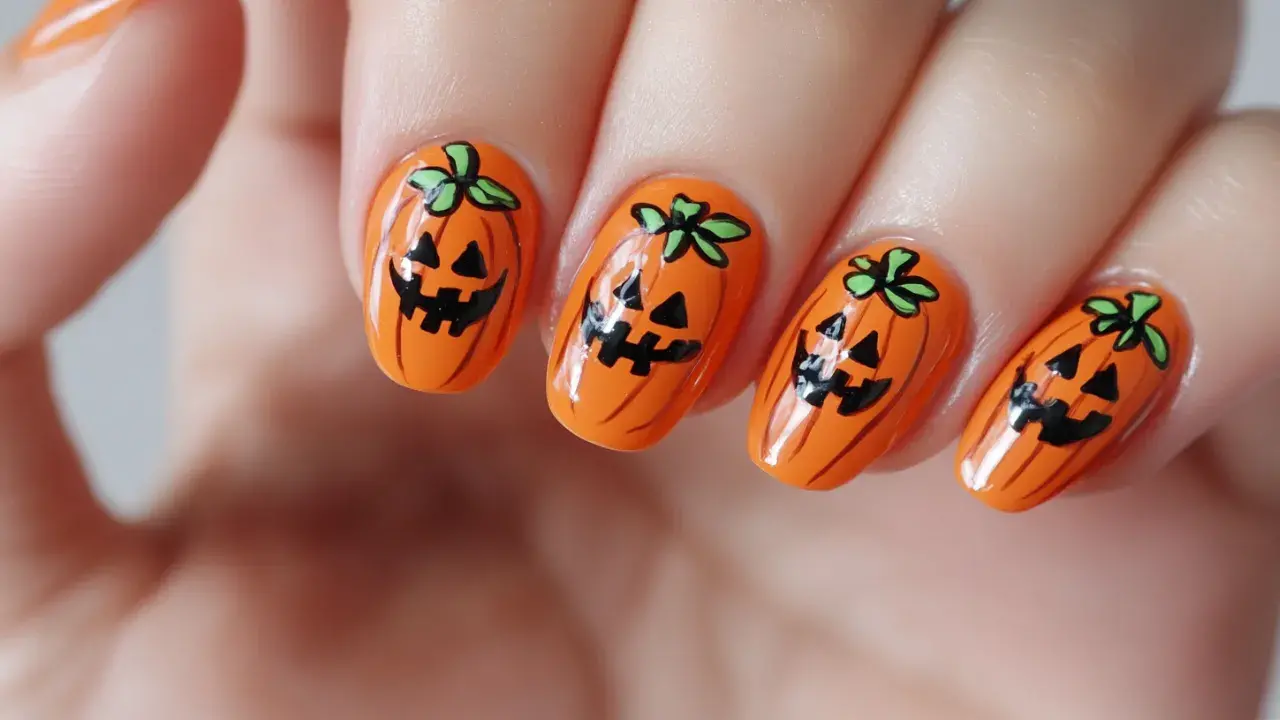
2. Cute Pumpkins
Description: Begin by painting your nails orange and draw small, smiling pumpkin faces on a few nails with a fine brush or a nail art marker. Add tiny green leaves at the top of the nail to mimic the stem.
How to do it: Use black polish for the faces and green for the stems. You can choose to do the pumpkins on a few nails or all of them.
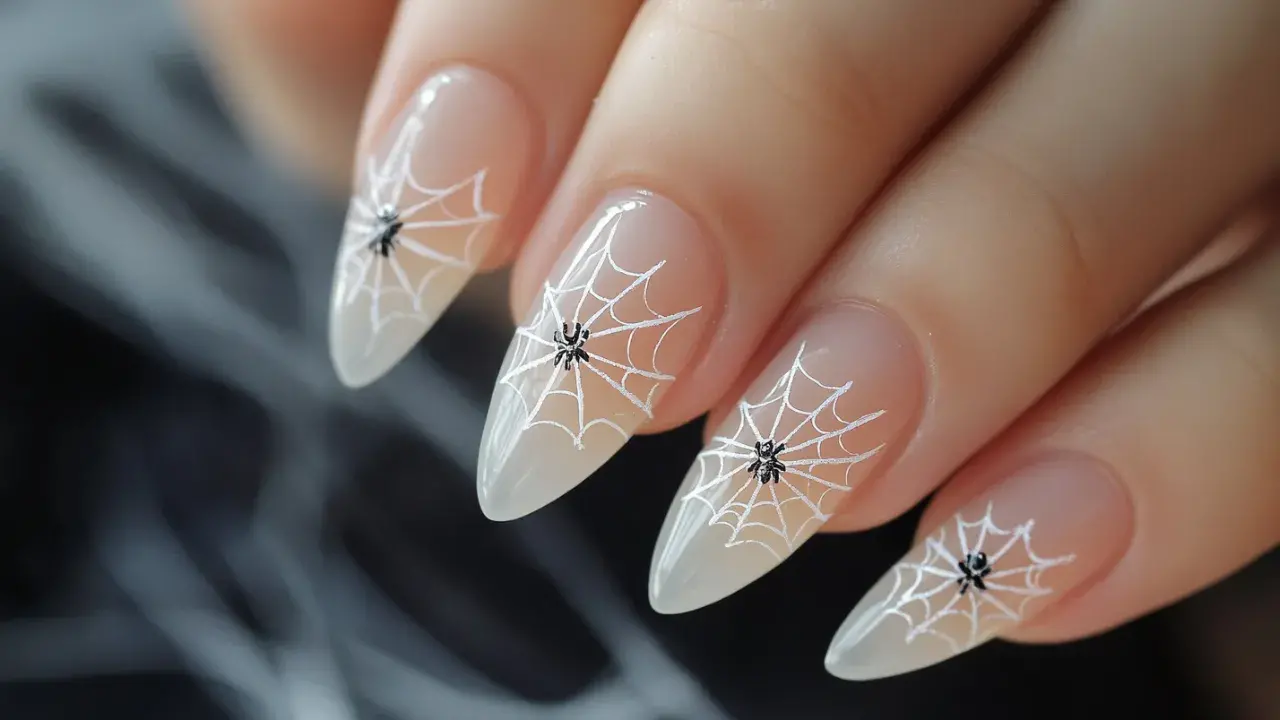
3. Cute Spider Webs
Description: Use a nude or transparent base and draw small white or silver spider webs in the corners of your nails. This design is delicate but perfect for the season.
How to do it: Draw the radial lines of the web with a fine brush, then connect them with subtle curves to form the web.
4. Flying Bats
Description: Paint your nails a dark base color, like purple or blue, then add silhouettes of small black bats flying across the nails.
How to do it: Draw the silhouettes with a fine brush in different sizes, focusing on the tips of the nails to create the effect of flight.

5. Halloween Black Cats
Description: Paint your nails in purple or light gray and draw small black cat faces with bright eyes on a few of the nails.
How to do it: Use black polish for the cat faces and white or yellow for the eyes. Add tiny details like whiskers and ears with a fine brush.

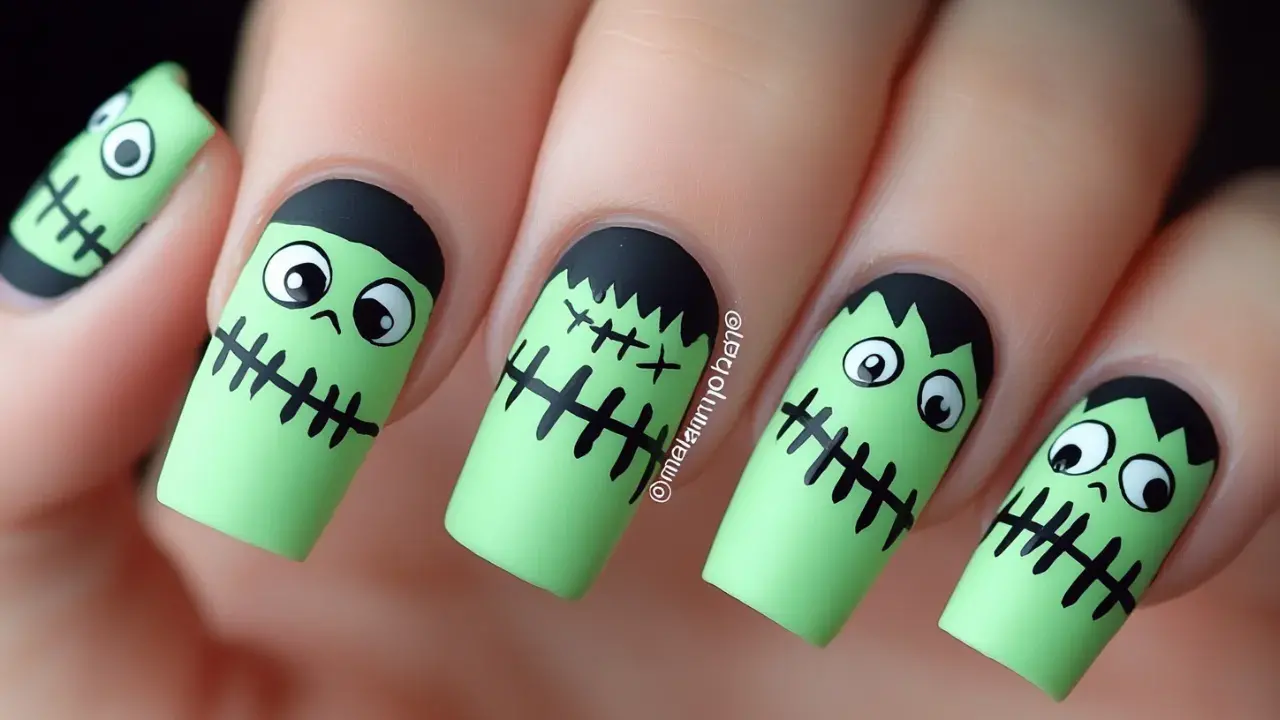
6. Fun Frankenstein
Description: Here, paint your nails in a light green color and draw small black scars or stitches to recreate the Frankenstein look. You can add googly eyes or draw eyes with white polish for an even more fun touch.
How to do it: Use black polish and a fine brush to trace the scars in different directions. Add the eyes with white and black polish.
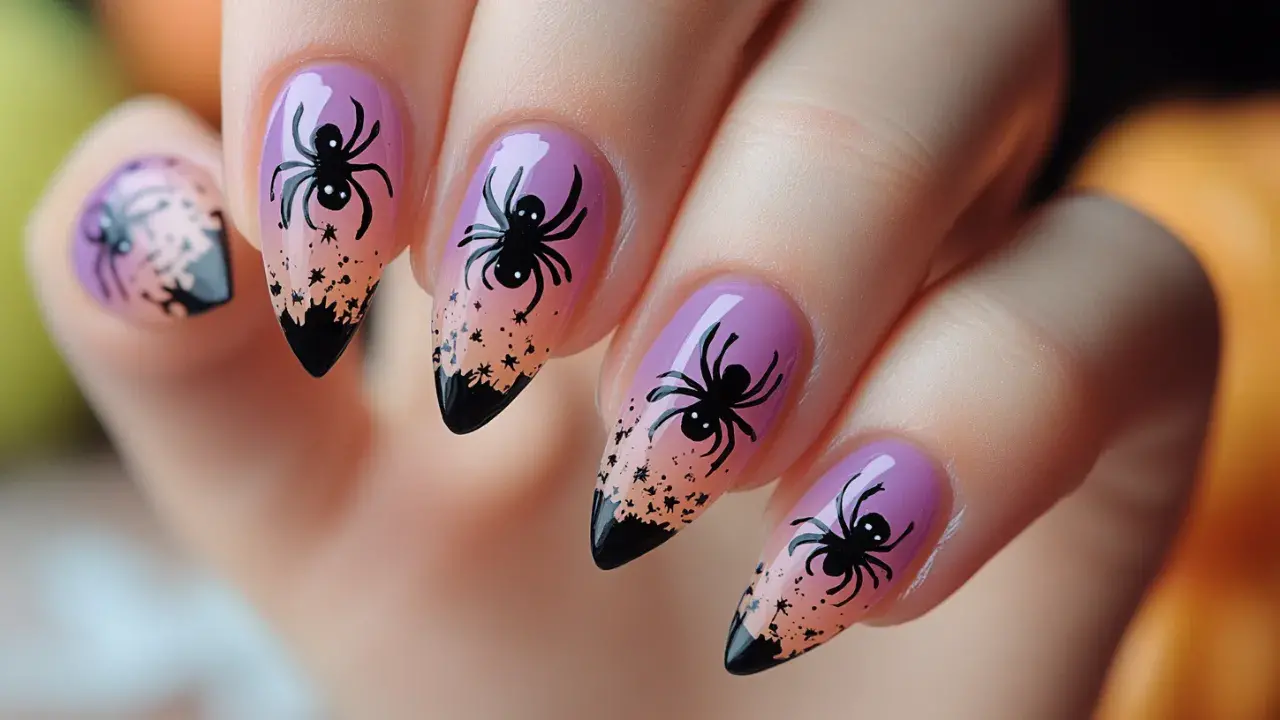
7. Spiders on a Clear Base
Description: Use a clear or nude base and draw small black spiders on a few nails. To give them a cute touch, make them round and friendly instead of scary.
How to do it: Use black polish for the spiders and a fine brush to draw their legs. Add white eyes to give them a more adorable, friendly expression.
8. Candy Corn Nails
Description: Paint your nails in color layers representing candy corn: orange, white, and yellow, to achieve a sweet candy-inspired gradient. It’s a simple design that’s perfect for Halloween.
How to do it: Apply the three color stripes in order, using some tape to separate each section if needed.

9. Cute Blood Drops
Description: Use a nude or white base and add small drops of "blood" with red polish on the tips of the nails, making it look like they’re dripping down toward the cuticle.
How to do it: Use a toothpick to draw irregular red drops, and add a bit of shimmer for an extra sweet touch.

10. Wrapped Mummies
Description: Paint your nails white and draw horizontal black lines like bandages, leaving small spaces to draw glowing eyes peeking through the wraps.
How to do it: Use a fine brush for the black lines and yellow or white polish for the eyes. It’s an easy and fun design that captures the Halloween spirit.

Extra 1. Spooky Skulls in Black and White
Description: Use a black polish base and draw white skulls with spooky or funny expressions on a few nails. Play around with the sizes and expressions of the skulls to give them a scarier, yet always fun, vibe, like big eyes or wide-open mouths. You can also add details like cracks or small cobwebs around the skulls.
How to do it: Apply black polish on all your nails. Use white polish to draw the skulls and their details, like eyes and mouths. For an extra touch, use silver or dark gray polish to draw cracks or cobwebs in the corners of some nails.

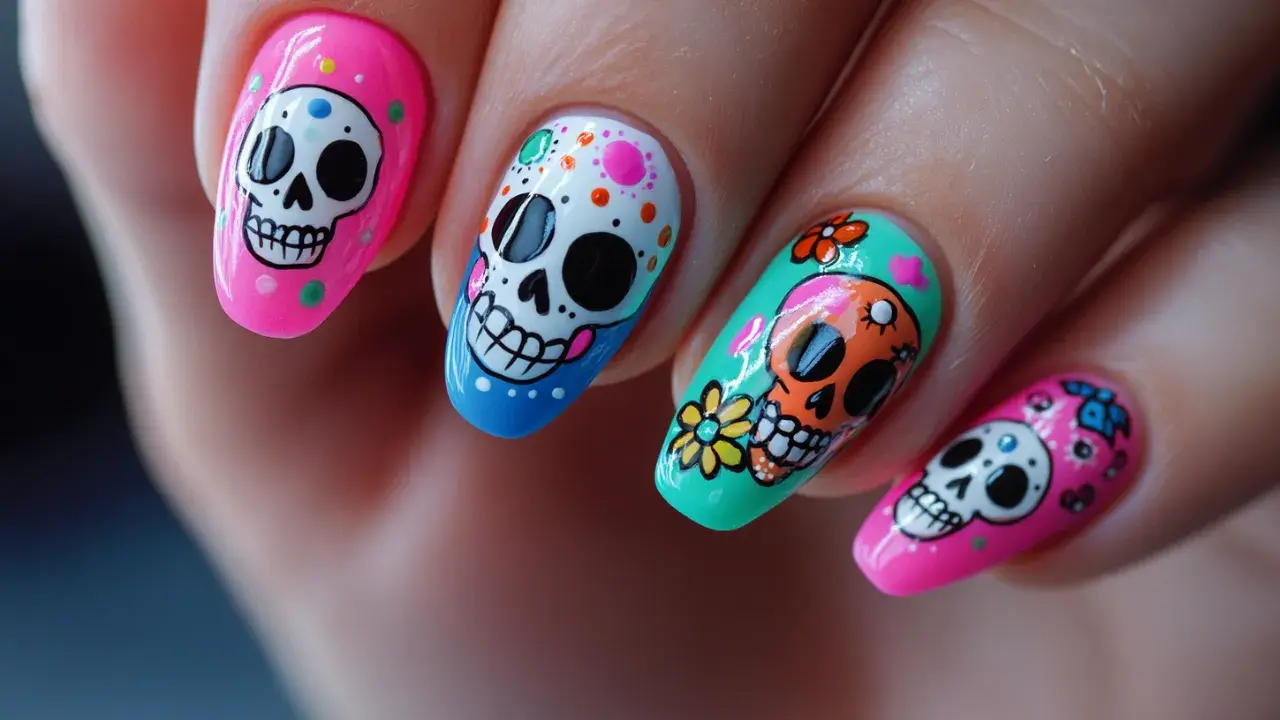
Extra 2. Colorful and Fun Skulls
Description: Paint your nails with bright colors like pink, blue, or neon green. Then, draw small white skulls on each nail and add colorful details for the eyes, nose, and mouth. You can play with fun facial expressions for each skull to give them a playful or cute personality.
How to do it: Use white polish for the skulls and then colorful polishes to draw the eyes and other details. Add dots, flowers, or small hearts around the skulls for a more cute and cheerful touch, inspired by Día de los Muertos.
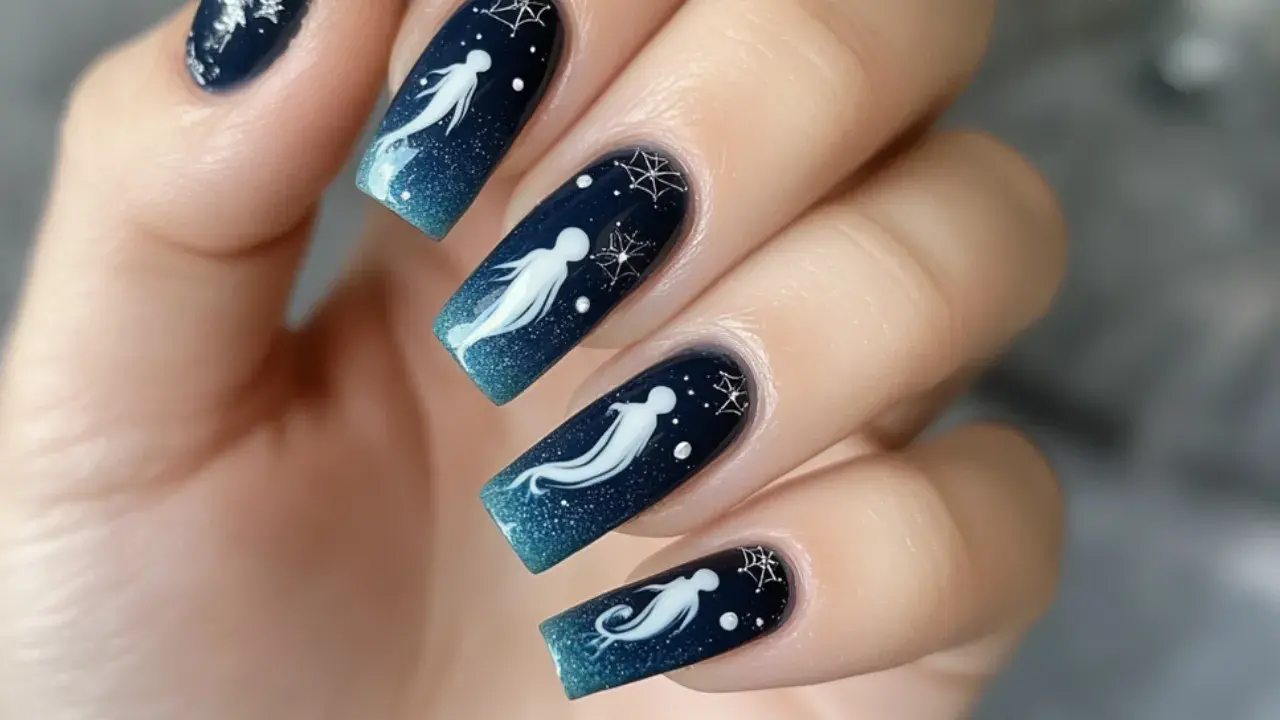
Extra from the Sea: Ghostly Mermaids
Description:Paint your nails in a gradient of navy blue and turquoise tones to mimic the depths of the ocean. Then, add some ghostly mermaid silhouettes in white or silver on a few nails, along with details like seashells and starfish on others. For an extra Halloween touch, add small hints of shimmer on the tips to mimic the moonlight reflecting on the water.
How to do it:Use a fine brush to draw the mermaid silhouettes and marine details. You can also add silver cobwebs or tiny ghostly sea creatures for a spookier vibe.
In conclusion, Halloween is the perfect time to get creative and have fun with your nail designs! Whether you prefer spooky skulls or cute and colorful ones, there’s a look for everyone. I absolutely love how you can mix and match different styles to express your unique personality. So grab your favorite polishes, and let your nails be as fabulous as you are this spooky season! 🎃💅

To see more amazing pictures and leave a comment, go to the Pinterest board for this article: Click

Tastes of La Paz.