Halloween Ghost Cupcakes
Savor the World.
Halloween Ghost Cupcakes
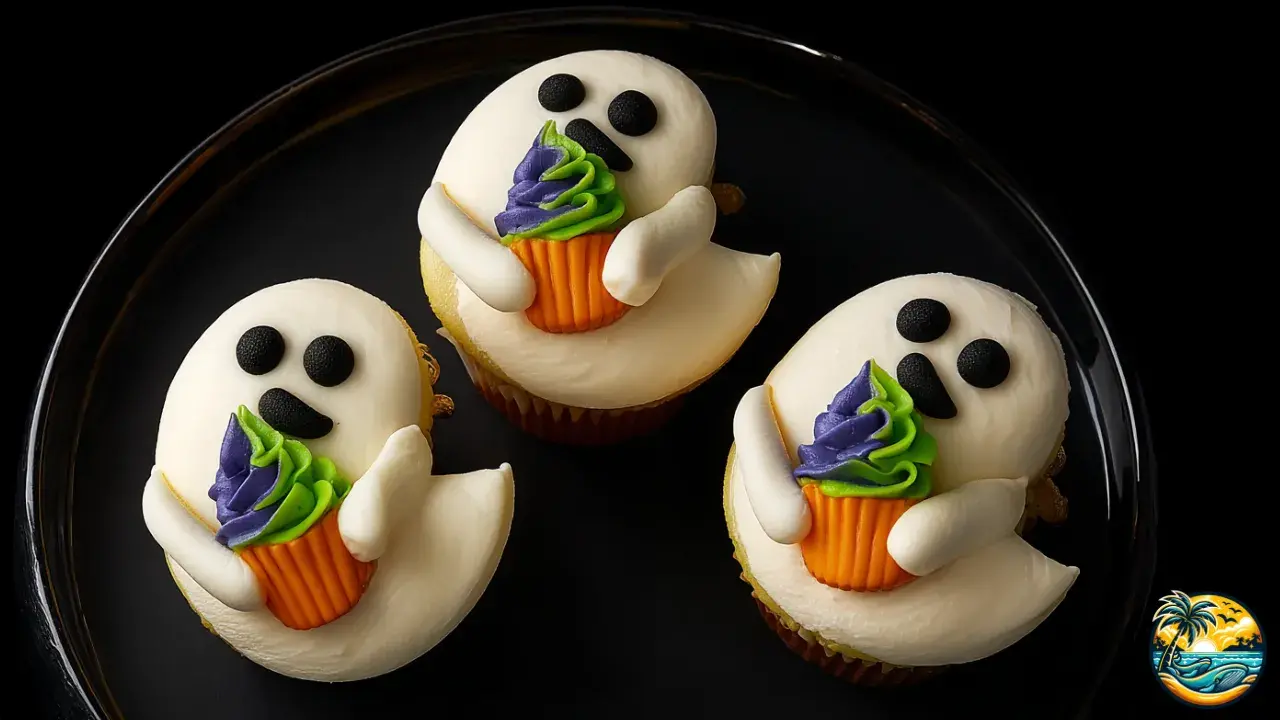
Spooky season is here! I love this time of year—not just because of Halloween, but the whole fall vibe itself… though, of course, I’m totally crazy about Halloween! And cupcakes—come on, who doesn’t love cupcakes? So, we’re going to make some super fun and extra delicious ghost-shaped cupcakes. And when I say ghost-shaped, I really mean ghost-shaped. You’ll see, I’m sure you’re gonna love them! 🎃👻

Halloween Ghost Cupcakes
Servings:12 servings
Prep Time: 20 minutes
Cook Time: 20 minutes
Total Time: 40 minutes
Ingredients
- 1 box (15.25 oz / 432 g) vanilla or white cake mix
- 3 large eggs
- 1 cup (240 ml) water
- 1/2 cup (120 ml) vegetable oil
- 1 cup (2 sticks / 226 g) unsalted butter, at room temperature
- 3 1/2 cups (420 g) powdered sugar
- 3–4 tablespoons (45–60 ml) cold heavy cream
- 1 teaspoon (5 ml) clear vanilla extract
- Purple and green gel food coloring (for the mini “cupcake” decoration)
- Black gel coloring or black icing for eyes and mouth
- Small edible cups/toppers made of fondant or candy “mini cupcakes” (optional but highly recommended)
- Pinch of salt (optional, to balance the buttercream)
Tools You’ll Need
- Muffin tin for 12 cupcakes and 12 liners
- Round METAL piping tips to create the ghost cutout: 1A or 808 (≈0.75–1 in / 2–2.5 cm diameter)
- Piping bags
- Decorating tips: large round (1A/808), medium round (#12), fine round (#2–#3), small star (mini 1M or #32)
- Electric mixer
- Spatula and cooling rack
- Baking spray or light oil to coat the piping tips
See 5 variations of the recipe at the end.
You might also be interested in:
Did You Know?
That “micro drop of purple” in your buttercream isn’t witchcraft—it’s color theory! Purple cancels out yellow on the color wheel, giving you whiter, more photogenic ghosts without having to use white food coloring.

Instructions
- Let’s get started! Preheat your oven to 350 °F (175 °C). While it heats up, place liners in your 12-cup muffin tin.
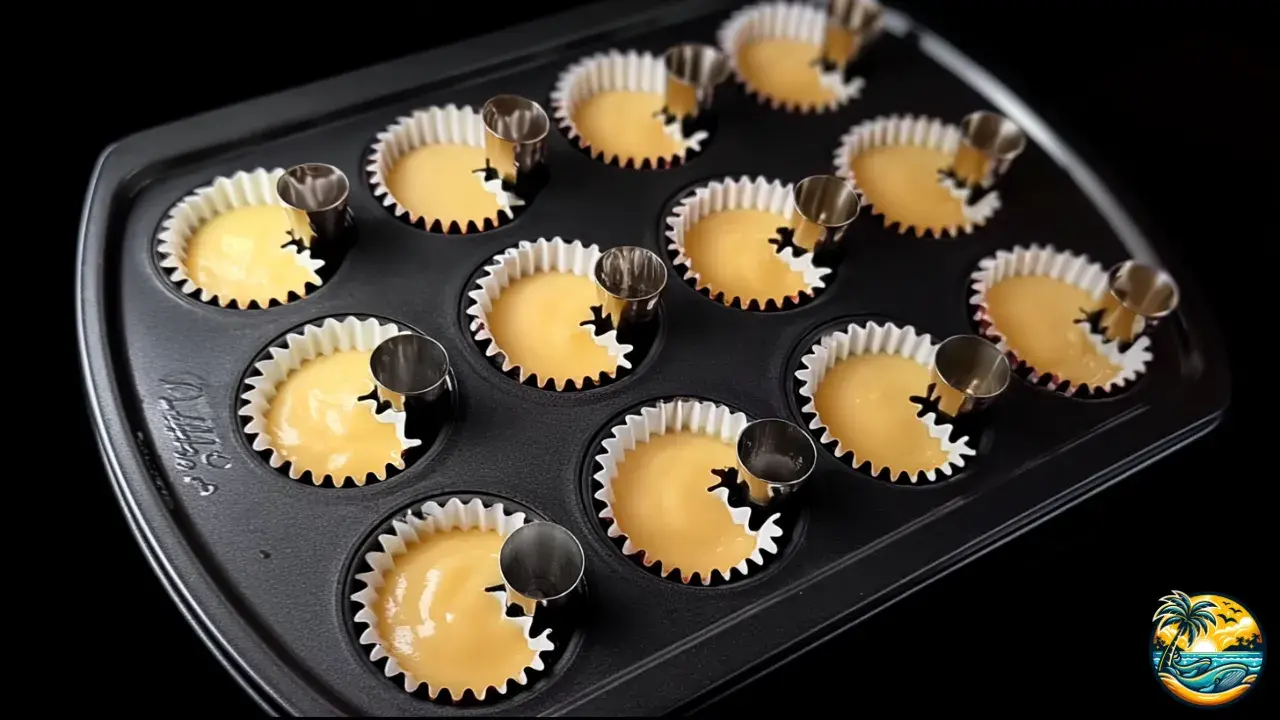
- Now prep the tips that will shape your ghosts: use round METAL tips and lightly spray the outside with oil, then wipe with a paper towel. These are just to give your ghosts that cool shape.
- Mix up the batter: in a large bowl combine the cake mix, eggs, water, and oil. Beat on medium speed for 2–3 minutes until smooth.
- As you can see in the photo, insert one tip into each cavity, pressing it against the edge of the liner with the opening facing upward. If you tilt it slightly, you’ll get that “flowing ghost tail” effect.
- Pour the batter around each tip, filling only 2/3 full. Super important—you don’t want them overflowing in the oven. Tap the pan gently to pop any bubbles.
- Time to bake! Place in the oven for 18–20 minutes or until a toothpick comes out clean. Once done, cool them in the pan for 5 minutes.
- Remove the tips carefully: twist gently to loosen and pull upward (use gloves or a clean towel if they’re warm). Transfer the cupcakes to a rack to cool completely. You’ll see a neat little crescent cutout—the ghost’s “mouth.”
- Make the white buttercream: beat the butter for 2 minutes until creamy. Add powdered sugar and salt in 2–3 additions. Mix in vanilla and 3–4 tablespoons of cream, whipping for another 2–3 minutes until fluffy and firm enough to pipe.
- Shape your ghosts: fill a piping bag fitted with a large round tip and pipe upward over the cutout, creating a tall, smooth dome that flows into the crescent for that “moving sheet” look.
- Add the ghost detail: place a small orange fondant cup/topper on the flat side of the dome. Using a small star tip, pipe a purple and green swirl to look like frosting on a mini cupcake.
- Now for the face: with a fine round tip (#2–#3) and black icing, pipe eyes and a mouth. With a medium round tip (#12), pipe two little “arms” so it looks like your ghost is hugging the mini cupcake. Cute, right?
- Finally, chill them for 30–45 minutes before serving so the shape sets. Keep refrigerated until party time, then let them sit out 10–15 minutes for the best texture. Super cute and totally delicious!

Ingredient Substitutions
- Cake mix: If you don’t have the exact one, go with vanilla or white; if all you’ve got is chocolate, it works too, but your ghost won’t pop as much.
- Vegetable oil: Swap it for the same amount of melted butter.
- Clear vanilla: No worries if you don’t have it, just use regular vanilla. To keep the frosting bright white, add a teeny drop of purple food coloring to cancel out the creamy tone.
- Unsalted butter: You can totally use salted, just skip the pinch of salt in the frosting.
- Heavy cream: Switch it out for cold evaporated milk plus 1–2 tablespoons (8–16 g) of powdered milk for extra body.
- Black icing: If you don’t have it, use mini chocolate chips or add some black gel coloring to your buttercream.
- Mini cupcake topper: Make one out of fondant, or grab a gummy candy and pipe a tiny swirl on top. Easy and cute!

Prep Tips
- Metal tips: Use round 1A/808 tips, coat them with the thinnest layer of baking spray, and they’ll come right out without tearing the cake or liner.
- Placement: Always press the tip against the liner edge and tilt it slightly for that “ghost in motion” look.
- Filling: Never go past 2/3 full; if you do, the batter will rise over the tip, the shape will be lost, and you’ll have a mess.
- Removing the tip: Twist gently to loosen right after baking (while still warm), then pull it out once the cupcakes have cooled a bit.
- White buttercream: Whip it an extra 2–3 minutes and use clear vanilla; if it turns yellowish, one micro drop of purple balances it out.
- Chilling: Chill cupcakes 15 minutes before decorating so the ghost’s dome pipes smoother.
- Even little arms: Mark two tiny guide points with the piping tip before squeezing out the buttercream “hands.”
Common Mistakes (What NOT to Do)
- No plastic: Never use plastic piping tips in the oven—they’ll melt and ruin the whole batch.
- Don’t overfill liners: If you fill them to the top, the cutout closes up and you lose the ghost shape completely.
- Don’t pull out the tip: Don’t yank it while piping hot or fully cold; do it warm so the cake doesn’t crack.
- Don’t frost warm cakes: Let them cool, otherwise the buttercream will just slide off.
- No liquid coloring for black: It’ll thin out your frosting. Stick to gel or dark cocoa plus gel.
- Don’t skip chilling: Always chill decorated cupcakes 30–45 minutes, or your ghosts will slump on the table.

FAQ
- What piping tip size works best? About 0.75–1 in (2–2.5 cm) for a clear cutout without weakening the cupcake.
- Can I use homemade batter? Absolutely—any basic vanilla cupcake recipe with a tender crumb works.
- How do I get bright white frosting? Clear vanilla and one micro drop of purple to cancel out the yellow tones.
- Can I make them with cream cheese frosting? Yes, delicious! Mix 8 oz (226 g) cream cheese with 1 stick (113 g) butter and 3–3.5 cups (360–420 g) powdered sugar.
- Can I make minis? Totally—just use smaller tips (≈1–1.5 cm) and bake 11–13 minutes.
- How do I avoid cracks in the crumb? Don’t overmix your batter and bake at 350 °F (175 °C) in the oven’s center.
- What do I use for eyes and mouth? Black icing, mini chocolate chips, or fondant, piped with a #2–#3 tip.
- Can I make the frosting ahead? Yes, up to 2 days refrigerated. Just re-whip 20–30 seconds before using.
- Can they be frozen? Yep—freeze undecorated for up to 2 months, well wrapped. Always thaw in the fridge.
- How do I transport them without squishing? Use a sturdy cupcake carrier and chill them 20–30 minutes before heading out.
Storing & Reheating
- Refrigeration: Store decorated cupcakes in an airtight container in the fridge for up to 3 days.
- Serving: Let them sit at room temperature for 10–15 minutes before eating.
- No reheating: The buttercream will melt and lose its shape if you try to warm them up.
- Freezing: If you baked them ahead, freeze undecorated cupcakes for up to 2 months.
- Thawing: Thaw in the fridge and decorate the same day you plan to serve them.

Serving Ideas
- Pair with a homemade Pumpkin Spice Latte.
- They’re amazing with a chilled Apple Cider spiced with cinnamon.
- Snack on buttery, smoked-salt popcorn for that sweet-salty contrast.
- Go fresh with apple slices and salted caramel dip.
- Feeling extra indulgent? Mini brownies topped with a marshmallow ghost make a spooky little duo.
Recipe Variations
- Red Velvet Ghosts: Cute and striking! Use red velvet base with bright white buttercream for contrast.
- Spiced Ghosts: Add 1–2 teaspoons of pumpkin spice for that cozy fall vibe and extra Halloween flair.
- Bloody Surprise: Fill with raspberry or strawberry jam—when you bite in, it looks like they “bleed.”
- Black & White: Use dark black cocoa for the base and extra white frosting on top for drama.
- Glow Party: Perfect for Halloween parties—add neon purple and green accents with high-intensity gel colors.

Nutritional Info (per serving, approx.)
- Calories: 330 kcal
- Protein: 3 g
- Healthy Fats: 15 g
- Carbs: 45 g
- Natural Sugars: 34 g
- Fiber: 1 g
- Sodium: 260 mg

Tastes of La Paz.
Halloween Ghost Cupcakes
Servings:12 servings
Prep Time: 20 minutes
Cook Time: 20 minutes
Total Time: 40 minutes
Ingredients
- 1 box (15.25 oz / 432 g) vanilla or white cake mix
- 3 large eggs
- 1 cup (240 ml) water
- 1/2 cup (120 ml) vegetable oil
- 1 cup (2 sticks / 226 g) unsalted butter, at room temperature
- 3 1/2 cups (420 g) powdered sugar
- 3–4 tablespoons (45–60 ml) cold heavy cream
- 1 teaspoon (5 ml) clear vanilla extract
- Purple and green gel food coloring (for the mini “cupcake” decoration)
- Black gel coloring or black icing for eyes and mouth
- Small edible cups/toppers made of fondant or candy “mini cupcakes” (optional but highly recommended)
- Pinch of salt (optional, to balance the buttercream)
Tools You’ll Need
- Muffin tin for 12 cupcakes and 12 liners
- Round METAL piping tips to create the ghost cutout: 1A or 808 (≈0.75–1 in / 2–2.5 cm diameter)
- Piping bags
- Decorating tips: large round (1A/808), medium round (#12), fine round (#2–#3), small star (mini 1M or #32)
- Electric mixer
- Spatula and cooling rack
- Baking spray or light oil to coat the piping tips
Instructions
- Let’s get started! Preheat your oven to 350 °F (175 °C). While it heats up, place liners in your 12-cup muffin tin.
- Now prep the tips that will shape your ghosts: use round METAL tips and lightly spray the outside with oil, then wipe with a paper towel. These are just to give your ghosts that cool shape.
- Mix up the batter: in a large bowl combine the cake mix, eggs, water, and oil. Beat on medium speed for 2–3 minutes until smooth.
- As you can see in the photo, insert one tip into each cavity, pressing it against the edge of the liner with the opening facing upward. If you tilt it slightly, you’ll get that “flowing ghost tail” effect.
- Pour the batter around each tip, filling only 2/3 full. Super important—you don’t want them overflowing in the oven. Tap the pan gently to pop any bubbles.
- Time to bake! Place in the oven for 18–20 minutes or until a toothpick comes out clean. Once done, cool them in the pan for 5 minutes.
- Remove the tips carefully: twist gently to loosen and pull upward (use gloves or a clean towel if they’re warm). Transfer the cupcakes to a rack to cool completely. You’ll see a neat little crescent cutout—the ghost’s “mouth.”
- Make the white buttercream: beat the butter for 2 minutes until creamy. Add powdered sugar and salt in 2–3 additions. Mix in vanilla and 3–4 tablespoons of cream, whipping for another 2–3 minutes until fluffy and firm enough to pipe.
- Shape your ghosts: fill a piping bag fitted with a large round tip and pipe upward over the cutout, creating a tall, smooth dome that flows into the crescent for that “moving sheet” look.
- Add the ghost detail: place a small orange fondant cup/topper on the flat side of the dome. Using a small star tip, pipe a purple and green swirl to look like frosting on a mini cupcake.
- Now for the face: with a fine round tip (#2–#3) and black icing, pipe eyes and a mouth. With a medium round tip (#12), pipe two little “arms” so it looks like your ghost is hugging the mini cupcake. Cute, right?
- Finally, chill them for 30–45 minutes before serving so the shape sets. Keep refrigerated until party time, then let them sit out 10–15 minutes for the best texture. Super cute and totally delicious!
Nutritional Info (per serving, approx.)
- Calories: 330 kcal
- Protein: 3 g
- Healthy Fats: 15 g
- Carbs: 45 g
- Natural Sugars: 34 g
- Fiber: 1 g
- Sodium: 260 mg

Tastes of La Paz.