How to Take Beach Photos
• Posted June 20 • 2024.
Whenever we look for information on how to take the best photos, we often come across advice from professional photographers, who of course have the best equipment with camera settings that we sometimes don't even understand or may not even need. Well, in this article, we will explore how to take perfect beach photos in a realistic way, that is, using the cameras that are most accessible to us, which are those of cell phones. This means that beach photography doesn't have to be exclusive to cameras or professional photographers. With your cell phone, you can capture impressive images if you know how to make the most of its features.
You might also be interested in:
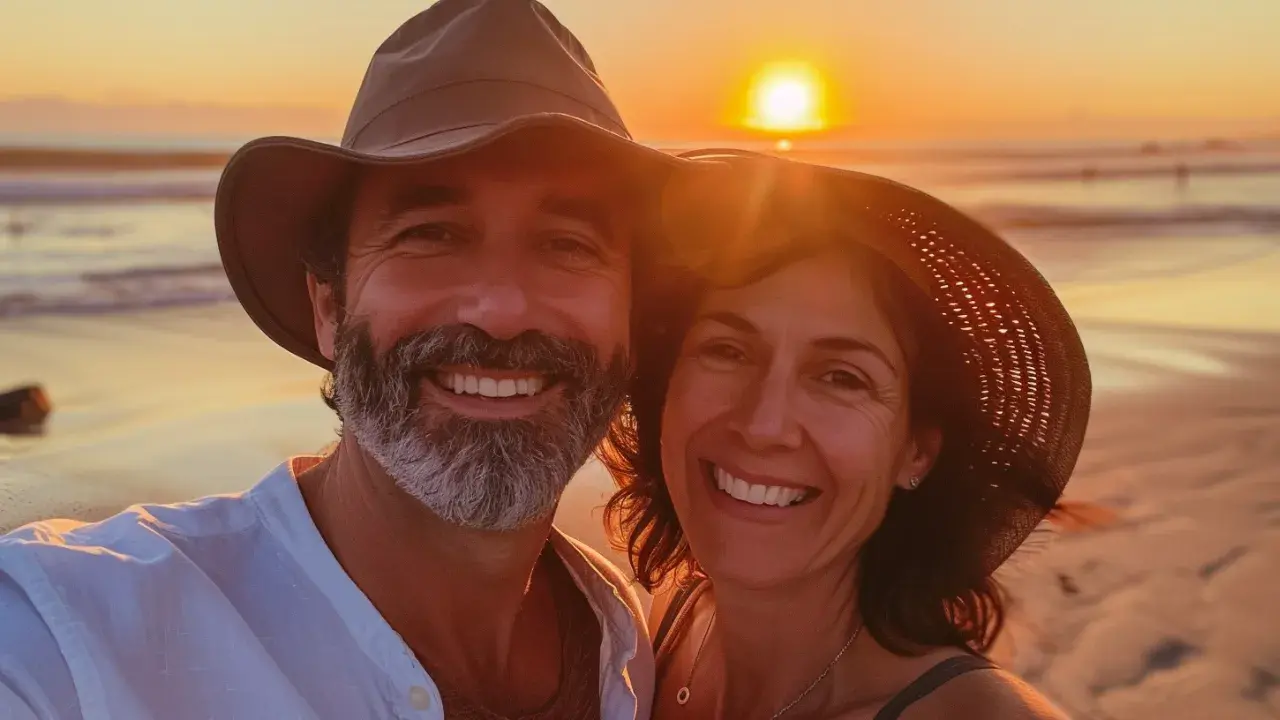
How to Take Selfies at the Beach?
Taking selfies has become almost a must these days, and at the beach, it can be a fun and memorable way to capture your moments under the sun. To ensure that your selfies capture not only your best angle but also the beauty of the surroundings, there are several considerations to keep in mind. First, lighting. Don't forget to also use the golden hours, which, remember, occur just after sunrise or before sunset, when the light is soft and flattering. This will avoid the harsh and strong shadows that the high sun can cast on your face. Also, always make sure the sunlight is in front of you or to the side to evenly illuminate your face, thus avoiding backlit conditions that can obscure your features.
Second, the background of your selfies is really important. Align your front camera to capture the beauty of the beach behind you, such as the horizon, the waves, birds, boats, people, or a line of palm trees. Use the front camera of your phone to have total control over the composition of the image. If you want to add a creative touch, you can play with angles: a selfie taken from a higher angle can be more flattering and add an interesting perspective to the landscape behind you. Conversely, as we all know, a poorly taken selfie from a lower angle can make us look like we have a gigantic double chin, LOL. Don't forget to try different expressions and poses to give more life and authenticity to your photos.
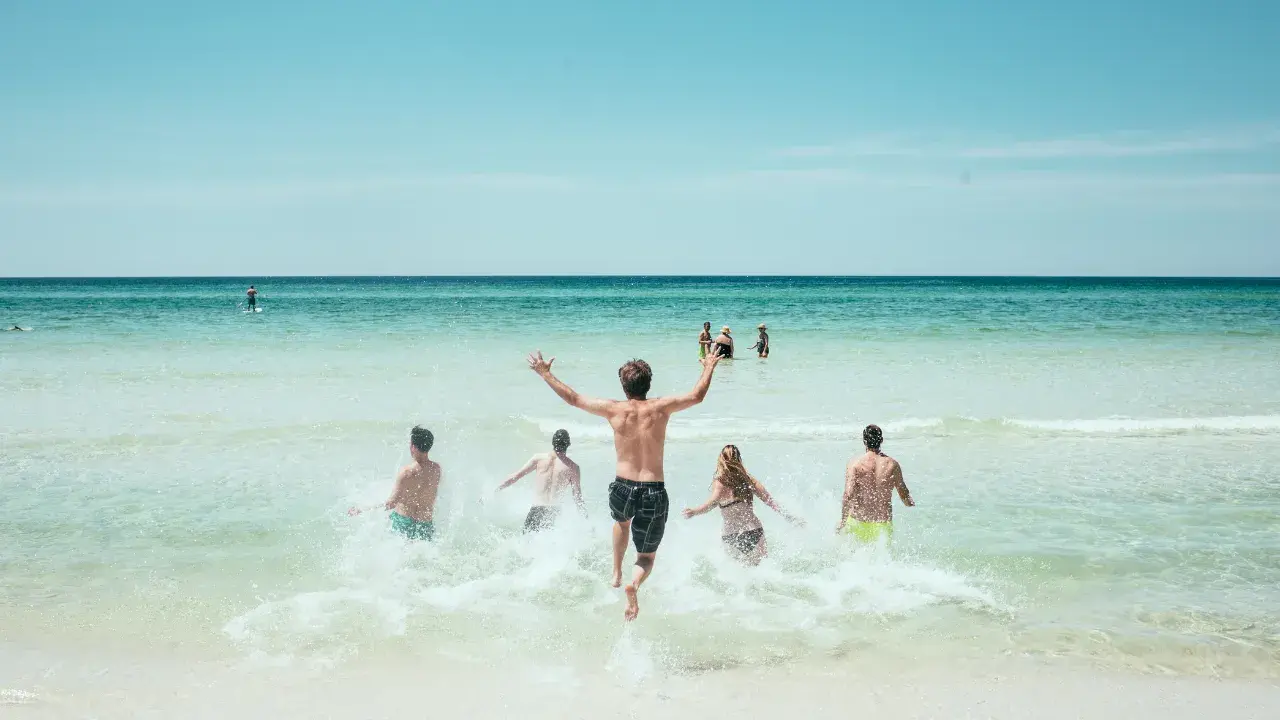
Capture the Movement
At the beach, movement is one of the most prevalent elements when it comes to taking photos. Whether it's the waves of the sea, the birds, the fish, or the wind moving the palm trees, the movement of nature will undoubtedly accompany us on the beach. Therefore, movement can be a great ally for your beach photos. For example, experiment with different shutter speeds to capture the motion of the waves; a fast speed will freeze the spray of the sea, while a slower speed can create a silky effect on the moving water. Don't forget to do this with the movement of people, birds, fish, boats, and the wind that moves the palm trees, and in this way, you will easily add life and dynamism to your images.
Experiment with Perspectives
If in everyday life, changing your perspective on a point can change everything, at the beach this happens more simply. Changing your point of view can completely transform a scene. Try taking photos from a low level to capture how vast the sky or the sea is, or go up to a high point to get a panoramic view of the beach and the surroundings. Don't limit yourself to standing perspective; lying down in the sand or climbing onto a pier can offer you unique angles that will yield results that will surprise you.
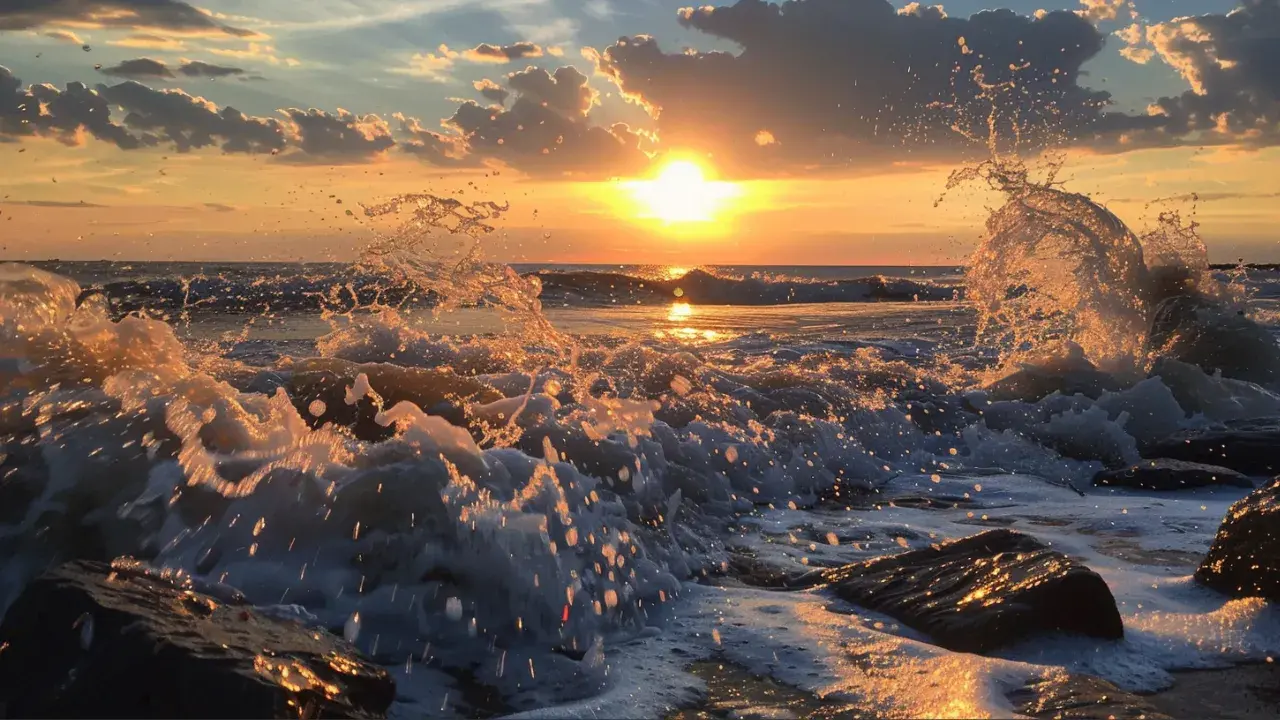
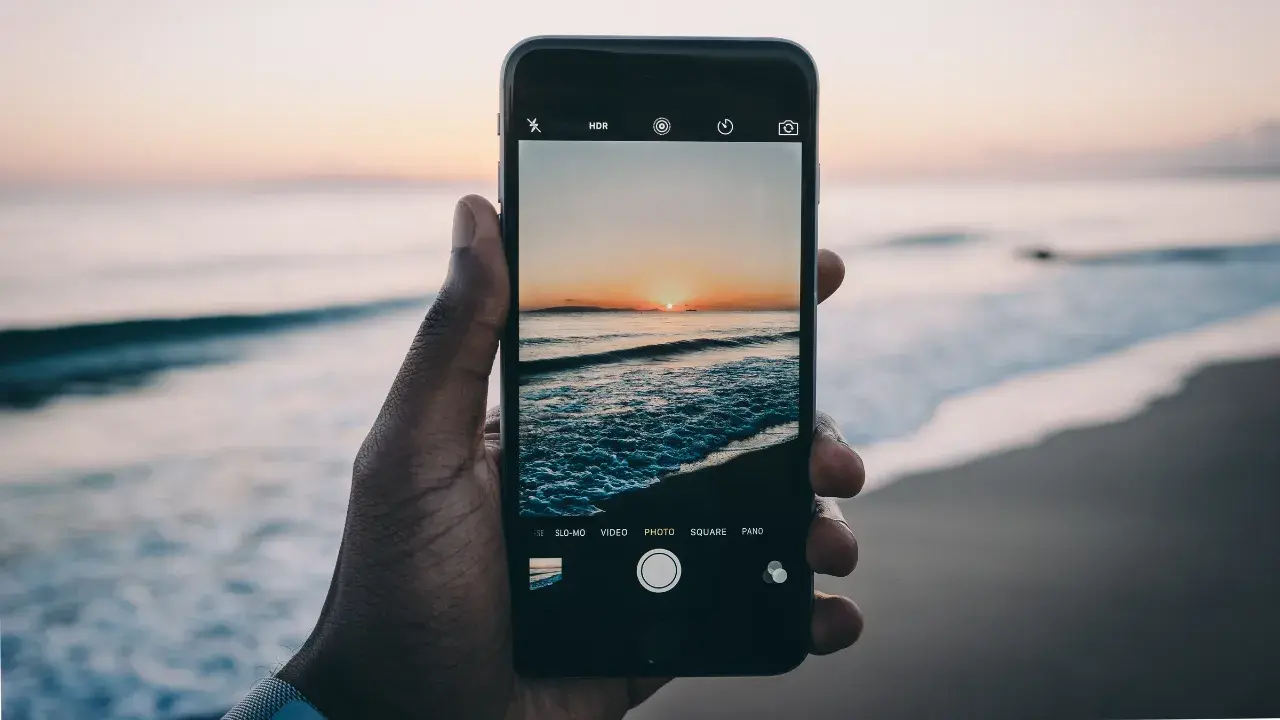
Use the Golden Hour: Shoot at Sunrise or Sunset
In the case of outdoor photography, natural lighting will always be your best ally for beach photography. To get the best photos, take advantage of the golden hours: just after sunrise or before sunset, when the light is softer and more golden. This not only avoids harsh and strong shadows, as well as uneven exposure caused by more intense sunlight, but it also adds a warm, attractive, and unique tone to your photographs. I also suggest considering using a polarizing filter on your cellphone to reduce the sun's glare on the water and enhance the colors of the sky and the sea.
Remember that during the golden hours, the tones are usually warmer, ranging from gold to reddish and orange, depending on the atmospheric conditions, of course. Taking advantage of this quality of light tends to enhance the natural colors of the surroundings, providing a more welcoming atmosphere to the photos. Additionally, the light reflected in the water can create shimmering effects that are hard to capture under other lighting conditions, and the elongated shadows created at these times on elements like rocks, piers, or people on the beach can add perspective and a sense of scale to the images. Use this to achieve the best beach photos.

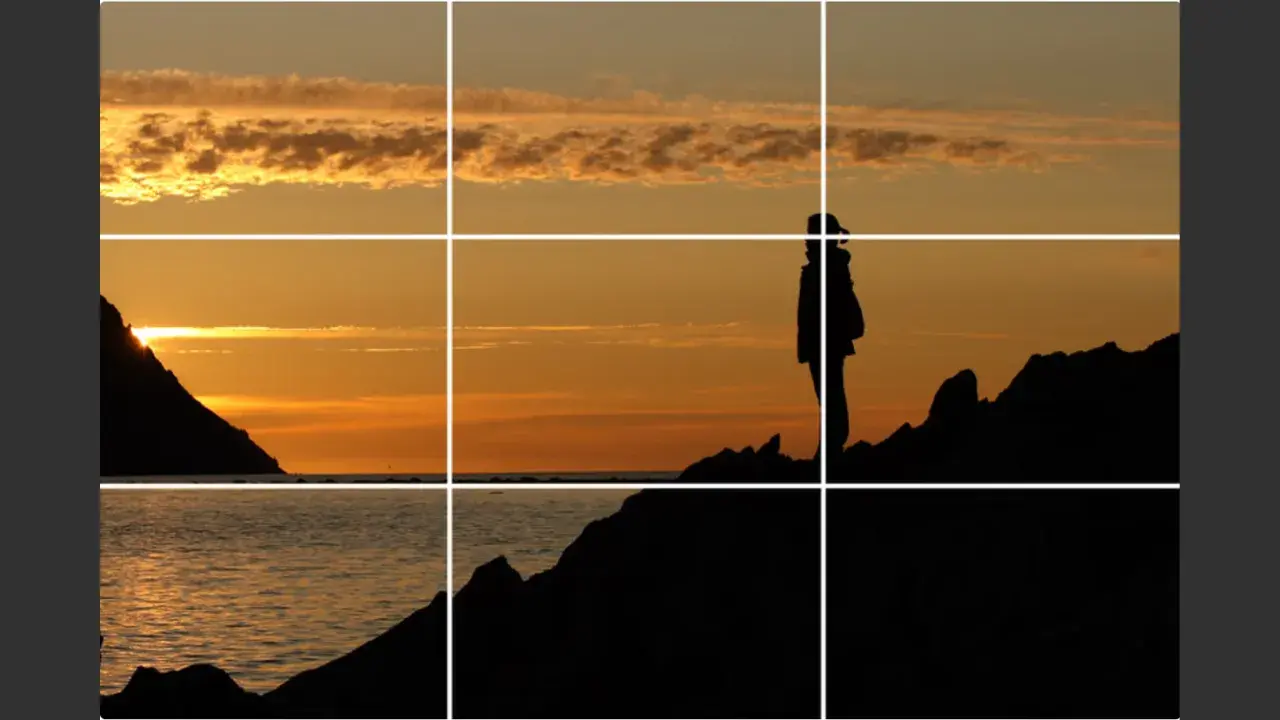
Experiment with Composition: Rule of Thirds
Play with the composition using the rule of thirds to make your photos visually more appealing. Place points of interest at the intersections or along the grid lines to create a balanced image that attracts the eye. Don’t forget to include elements like palm trees, rocks, or people to add depth and context to your photographs.
Remember, this rule is based on dividing the image into nine equal parts, using two horizontal and two vertical lines spaced evenly apart. This creates a visual grid that helps you position the most important elements of the scene at the points where the lines intersect, or along them, instead of centering them directly, which can result in less dynamic images. Essentially, this rule assists you in taking better beach photos.
When applying the rule of thirds in beach photography, you should always consider the natural elements that can serve as attractive focal points. For example, if you are taking a photo of a sunset, you might position the sun at one of the intersections in the grid, allowing the rest of the horizon to occupy the lower or upper horizontal lines. This not only balances the photo but also provides space for the viewer to "enter" the image, following the horizon line or the waves of the sea.
Another example could be photographing people or significant elements on the beach, such as a boat or a pier. Placing these subjects along the vertical lines or at the intersections can dramatically improve the visual impact of the photograph. Moreover, this approach can help direct the viewer’s gaze through the image, creating a visual narrative or leading them to explore more details in the environment.
The rule of thirds is also useful for managing "empty" spaces in the photo, such as the open sky or a stretch of sand. If you position these spaces within the top or bottom sections, or at the sides of the grid, you can create a sense of breadth or depth that makes the image more enveloping and aesthetically pleasing. Incredible, isn’t it?
Choose a Focal Point
Choosing a focal point in beach photography is one of the most important aspects because it gives the image a clear subject, improving the overall photo. When taking photos at the beach, you have a wide array of possible focal points such as people, wildlife, the interaction between the sea and the sand, or man-made objects like boats and piers. Each of these elements can tell a different story, depending on how they are framed within the environment.
For example, a single person standing at the edge of the water can create a very attractive focal point, invoking a sense of scale and solitude. Alternatively, focusing on a colorful beach umbrella among a bustling crowd can highlight the vitality and energy of a summer day at the beach. When choosing your focal point, consider applying the rule of thirds to place the subject off-center, which often results in a more visually appealing and balanced photograph. You can also use leading lines, such as the shoreline or a trail of footprints in the sand, to guide the viewer's gaze towards the focal point. These techniques not only reinforce the focus of your photograph but also enhance its artistic quality, simply making your beach photos the best.
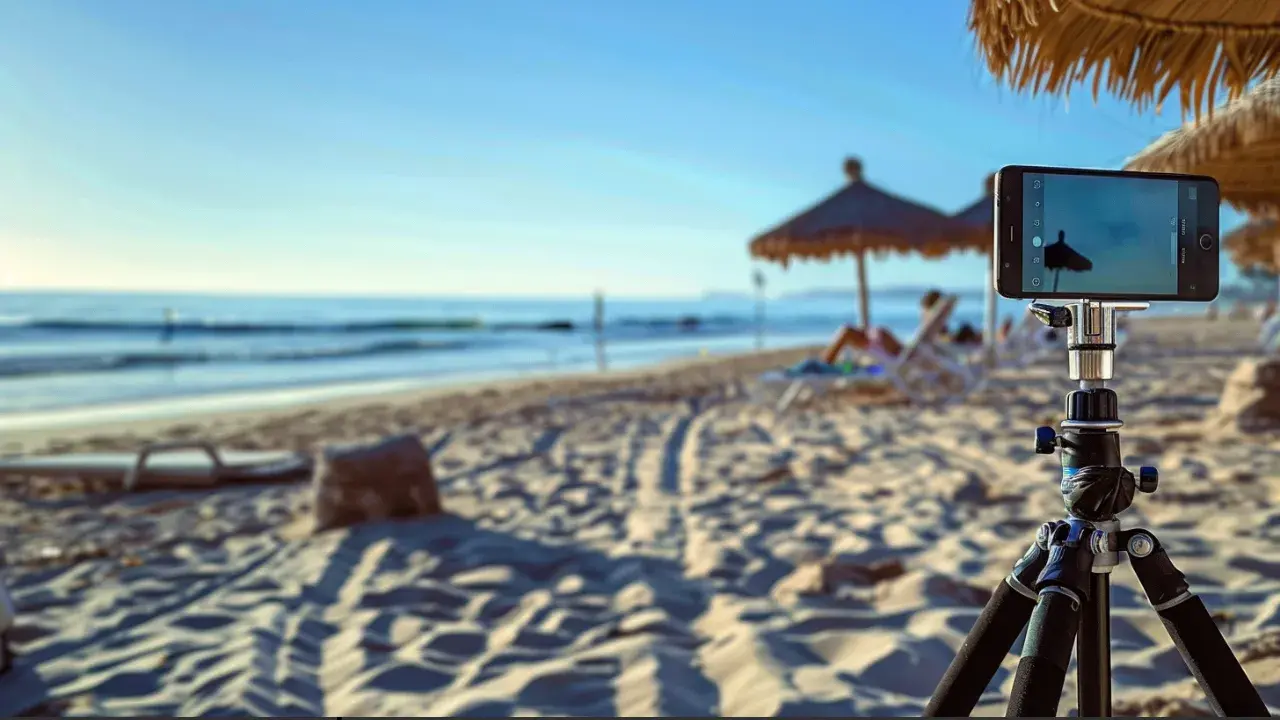
Use a Tripod
Using a tripod to take the best beach photos can greatly improve your images, especially in challenging lighting conditions or when capturing specific effects. We all know that taking certain photos without a tripod can result in them looking poorly focused, not sharp, or just poorly made. A tripod will give us the necessary stability to eliminate camera shake, achieving sharp and clear images. This is very important in low-light situations, such as during sunrise or sunset, when slow shutter speeds are needed to capture enough light. The steadiness of a tripod allows us to use these slower shutter speeds without the risk of blur caused by holding the camera by hand. Don't forget it!
Additionally, in a practical and straightforward way, a tripod can be a great help if we want to compose more thoughtful and intentional beach photos. When we have the camera securely mounted, we have the freedom to adjust the composition, focus more carefully, and experiment with different settings without worrying about maintaining the framing. For example, when capturing the movement of the waves, a tripod allows the use of long exposures, creating that silky and smooth effect on the water that is highly sought after in landscape photography. Similarly, for panoramic shots or sequences of images that will be stitched together, a tripod ensures that each frame is consistently aligned, which avoids those results with cracks or black parts that look horrible. So, don't forget, a tripod not only improves your photos at the beach but also allows you to be much more creative in them.
Edit Your Photos for Improvement
One of the most enjoyable parts of taking photos at the beach is when we get to edit them, using editing applications to enhance the quality of the images, whether on your cellphone or by downloading an app for it. Adjusting the contrast, saturation, and sharpness will allow you to highlight the colors and details of your photographs and make them even better. You can choose between a light and simple edit that keeps your photos very close to the original, or use applications like Lightroom or Snapseed that have such powerful tools they can transform your cellphone photos from simple images into works of art.
Take Advantage of Your Cell Phone's Camera Features
Today, most modern cell phones come equipped with really advanced camera features that can enhance your beach photography. Along with this, the quality of photography achievable with the cameras of an average cell phone is quite high, allowing us to achieve professional-quality photos without the need for expensive equipment. Here are some tips to maximize the camera functions of your phone at the beach:
- HDR Mode (High Dynamic Range): This feature is particularly useful in beach environments where the lighting differences between the sky and the land can be very pronounced. HDR mode takes multiple photos at different exposures and automatically combines them to create a final image that better represents details in both dark and light areas. Activate this function to capture the sky and the sea without overexposure while maintaining the details of the darker surroundings.
- Manual Exposure Control: Adjust the exposure manually to help prevent overexposed photos that often occur under intense sunlight. Lower the exposure to capture more details of the sky and water, thereby preventing these areas from appearing too bright or washed out, which can ruin your entire photo.
- Touch Focus: Don't forget to use touch focus to ensure that desired subjects, such as people, boats, or birds in flight, are sharp. For this, you can touch the screen at the specific point you want to focus on, thus giving priority to that element in the composition.
- Scene Modes:Many cell phones include preset scene modes that automatically adjust the camera settings for different environments. Use the "Beach" mode if available, as it is optimized to capture the blues of the water and sky and handle bright sunlight.
- Slow Motion and Time-Lapse: The slow-motion function is excellent for capturing detailed movement of the waves or activity on the beach. On the other hand, time-lapse can be wonderful for showing changes in the landscape, such as the movement of clouds or the flow of the tide, offering a dynamic and attractive perspective of a day at the beach.
- Filters and Live Effects: Do not underestimate the built-in filters and live effects offered by many smartphones. These can be used to instantly enhance the mood of your photos, adding saturation to a sunset or applying an artistic effect that complements the scene.
Protect Your Phone
We must not forget that sand and salt water can severely damage our cellphones. The good news is that we can now buy protective cases for a few dollars that even allow us to take photos and videos underwater without any problem or risk to our equipment. On the other hand, don't forget to clean any sand residues that your phone may have after ending the day and having taken the best beach photos.

You might also be interested in:
In conclusion, taking excellent photographs at the beach is no longer just a matter for professionals. Capturing the best moments of your vacations, outings, or escapes to the beach is quite simple with any cell phone. Taking stunning beach photos with the tips we've mentioned will make your photos look better than all the rest, and most importantly, when you look at them, a smile will be drawn on your face as you recall those wonderful moments that you have captured for eternity.
To see more amazing pictures and leave a comment, go to the Pinterest board for this article: Click

Tastes of La Paz.